Bro Cave: @SlamTarts
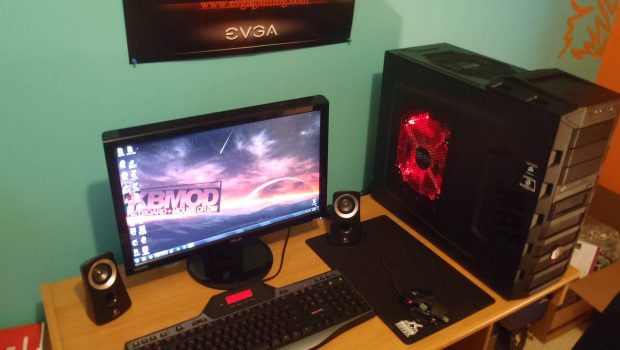
It’s everybody’s favorite time again: Bro Cave of the week. Earning this week’s top honors, we have a nice clean build from Ryan, aka SlamTarts.
Part of the reason I wanted to highlight this build is actually due to some of the discussion on the KBMOD forums. There was some debate on the forums regarding the orientation and fan placement of his Hyper 212+. Ryan had run into an issue with his high profile RAM and chose to configure his cooler with the fan at the back of the case. Some cried foul and said this was detrimental, but they might actually be wrong.
Anyway, without further ado:

Hello everyone, @SlamTarts here, and I felt it was time to show you my setup!
First, I want to talk about what led me to drop console and build this rig last September. Okay, so it started with a Mac. Go ahead and get it out of your system. I know Macs suck, but I didn’t buy it–my Dad did. So being what I thought at the time was a hardcore gamer, I thought it would be appropriate to download Steam and maybe try out Team Fortress 2. Between Team Fortress 2 and Counter Strike: Source, I logged hundreds of hours, but I was playing on a Mac that had very limited capabilities and lacked other titles.

I truly believed that a gaming PC would have been a waste, but that changed this past summer. I took a course in 3D modeling and video game design at the San Francisco Academy of Art. Now these classes had quite the setup, with a room packed with 30 or so Alienware Area 51 PCs (I know, boooo Alienware). For me, this was heaven and I was able to test out all those games I never could and fell in love with one of the many things that makes PC gaming better: mods. I just felt that sense that if you wanted to actually have a gaming experience with a great community, you had to be on PC. So I set to work budgeting.
To me, budgeting is one of the most fun and terrible parts of building a PC. At some points, you’re ecstatic at some of the deals you find, and at other times, you’re devastated because you can’t afford SLI 580s. So as every person should do before building, I spent hours of time on Newegg doing research. My budget was around $1,400, which doesn’t go as far when you live in California, since you have to pay tax at sites like Newegg. This is what my finished product looked like:
CPU: Intel Core i5-2500k
GPU: EVGA GTX 560 Ti
RAM: 8GB of Corsair Vengeance
HDD: 1TB Western Digital Caviar Black
Case: Cooler Master HAF 922
CPU Cooler: Cooler Master Hyper 212+
PSU: Corsair TX750m
Mobo: ASUS P8P67 LE
Monitor: ASUS VH226H 21.5″
KB+M: Logitech G510 and Cyborg R.A.T. 7


Overall, I felt I had done a solid job building with no prior experience. I know my wiring is bad, but that is just because I just recently put the Hyper 212+ in it and had to take the motherboard out. I am looking to buy another monitor in the coming months and I might possibly get another 560 Ti.
So I hope you enjoyed my bro cave and if you want to hit me up, I have made the Tribes: Ascend channel in the KBMOD Ventrilo my home on most weekends and some week nights. Feel free to ask questions about my build below.
P.S. My walls are baby blue because I happen to have a sister who thinks it’s funny to paint the room before she leaves for college. -____-


11 Responses to Bro Cave: @SlamTarts